THE BANSHEE ZONE
Ignition Timing
The 2 most common ways to adjust the ignition timing on your Banshee is the use of an "adjustable stator/timing plate" or the use an offset flywheel key made by Vito's Performance called a "Degree Key". Both methods are found on this page..... enjoy !!
Installing a Degree Key
The "Degree Key", manufactured by Vito's Performance, is a small metal flywheel keyway that replaces the stock flywheel keyway. All your doing here is replacing the stock keyway with a Degree Key keyway. The Degree Key has an offset built into its design as opposed to the stock keyway which has no offset......... this offset in the keyway is what determines how much the keyway will advance your ignition. Vito's makes 2 Degree Key models, the +4 key and the +7 key. Most owners choose the +4 Degree Key because a +4 advance is just about perfect for a Banshee modified with pipes and air filter mods. The +7 Degree Key is new to the market and is designed for more "radical" Banshee's, drag racers, hill shooters etc........ You can buy either the +4 or the +7 at www.MobileDyno.com , buy a flywheel puller from MobileDyno.com when you order your Degree Key.
Start off by removing the foot peg from the stator side of the engine, remove the gear shift lever and the plastic engine side case. The rubber gasket on the side case is reusable.
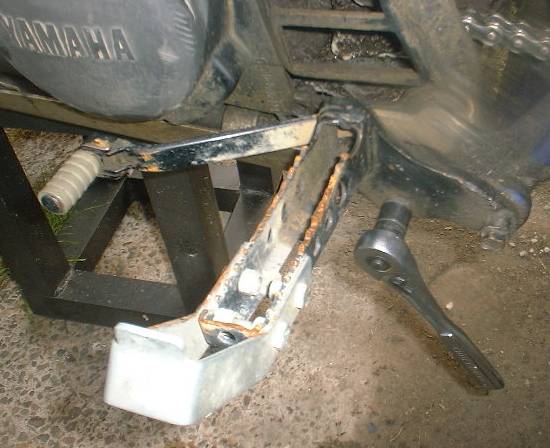
Removing the plastic side case exposes the flywheel. The flywheel is attached to the end of the crankshaft with a 17 mm nut. The keyway is found underneath the flywheel and indexes the flywheel to the crankshaft. The flywheel contains magnets and spin around the stator, producing the electrical current to power your headlights and ignition.
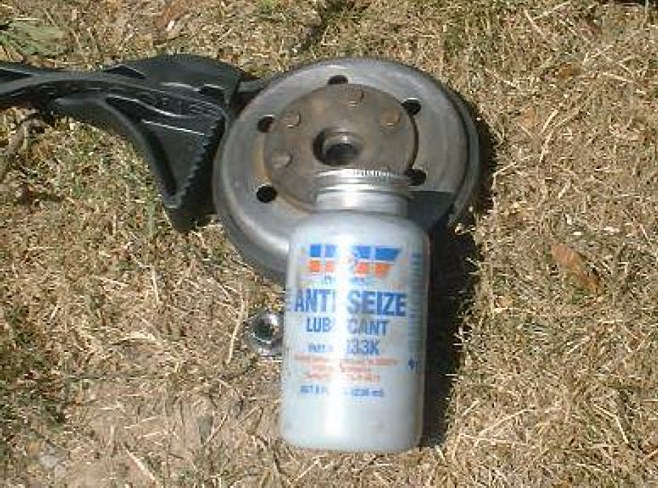
In this picture you can see the strap wrench tool that I use to hold the flywheel from spinning while loosening the 17 mm nut that holds the flywheel on the crank. The nut is tight and comes off the crank spinning in the normal fashion.... "righty tighty, lefty lucy". A good idea would be to spray the whole flywheel area with penetrating oil designed to loosen stuck or rusted parts.
Finally broke the nut loose, the strap wrench worked great for holding the flywheel from spinning. The nut size is 17 mm
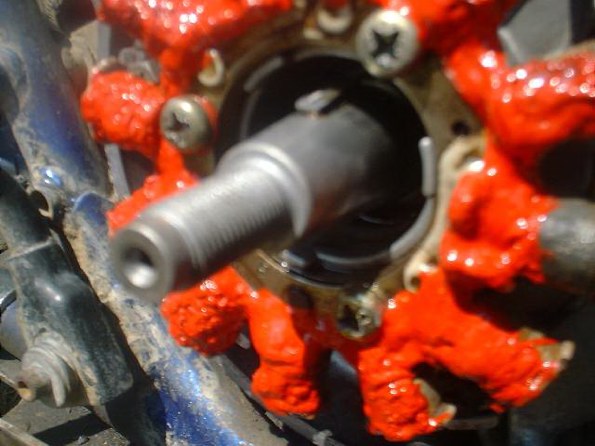
There is only one tool for the job of pulling the flywheel off the crankshaft...... A FLYWHEEL PULLER. You can buy one of these handy tools from www.MobileDyno.com
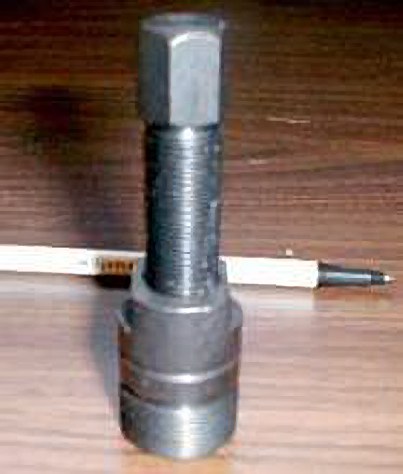
Thread one part of the flywheel puller into the threads in the flywheel. These threads are REVERSE THREADS.
So.... "right lucy, lefty tighty"
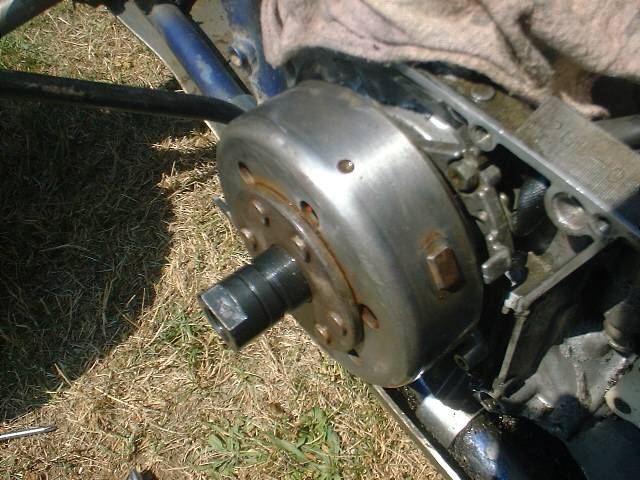
Thread the puller all the way as far as it will go.
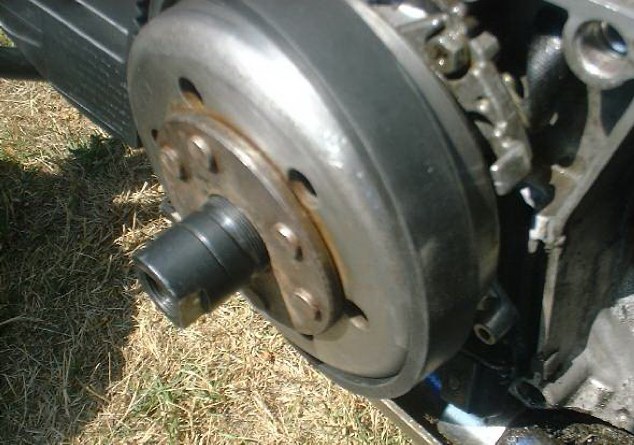
Now thread in the flywheel bolt and gently apply pressure. Never hit the flywheel with a hammer or mallet, you could damage the flywheel. Never pry with a screwdriver either, using a screwdriver or pry bar will damage the stator that is under the flywheel. Sometimes these flywheels can be really hard to remove. Put a pipe extension on your ratchet handle to increase your leverage on the ratchet. You can also try tapping on the ratchet handle while applying pressure. With patience, a little sweat and some luck, the flywheel will pop off the crankshaft.

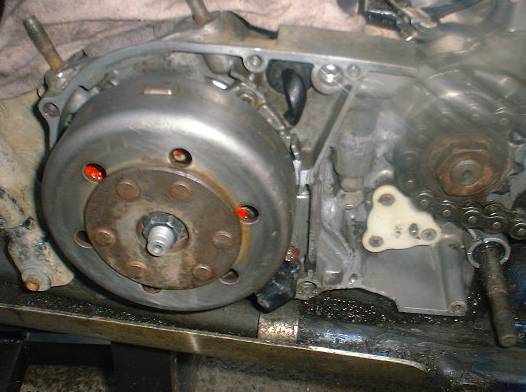
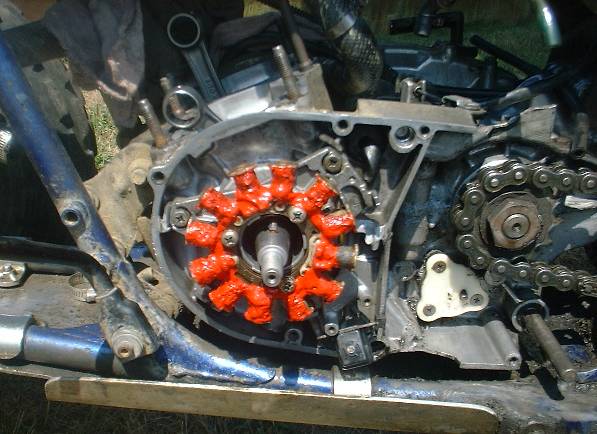
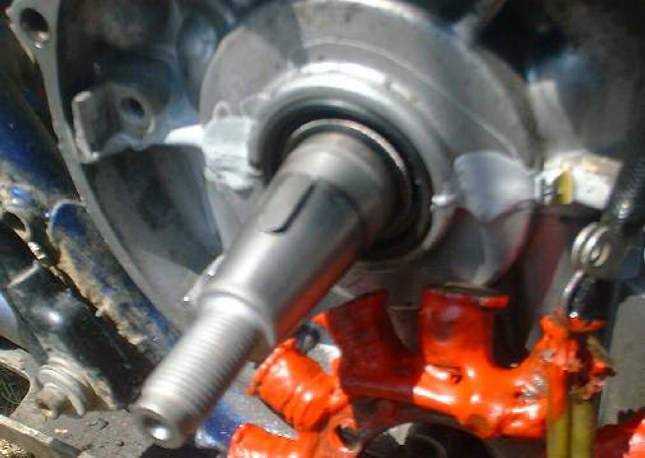
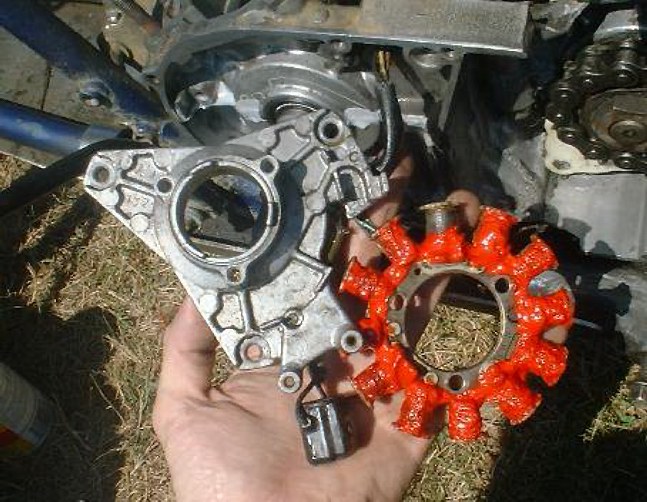
The flywheel is off and red part you see is the stator. The red color is from red liquid electrical tape I put on to cover any cracks in the insulation on the stator. You can see the keyway sitting in its notch on the crankshaft.
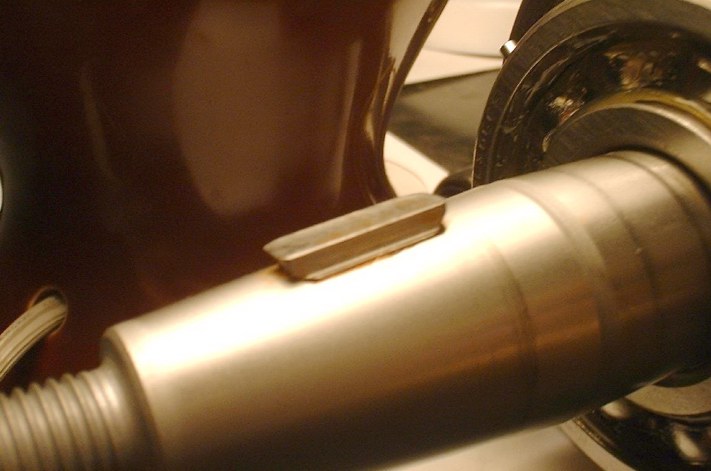
Here is a close up of the keyway the gets replaced with the Degree Key. Next step is to remove the stator from the stator plate. Remove the 3 Phillips head screws you see in the picture, and remove the stator.
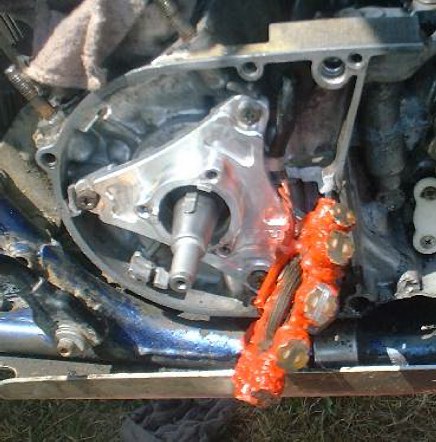
This picture show the stock keyway with the stator AND the stator plate removed. It is not necessary to remove the stator plate to install a Degree Key, but it makes it easier. Pry the stock keyway out of the groove and replace with the Degree Key. READ THE INSTRUCTIONS THAT COMES WITH THE DEGREE KEY !!! The offset in the keyway goes a certain direction, make sure you install it correctly.
Keyway is removed and ready to install the Degree Key. Install the Degree Key and install the stator plate and stator.
Ahh... a great picture that I once took. Its a Degree Key installed in my new TDR crankshaft.
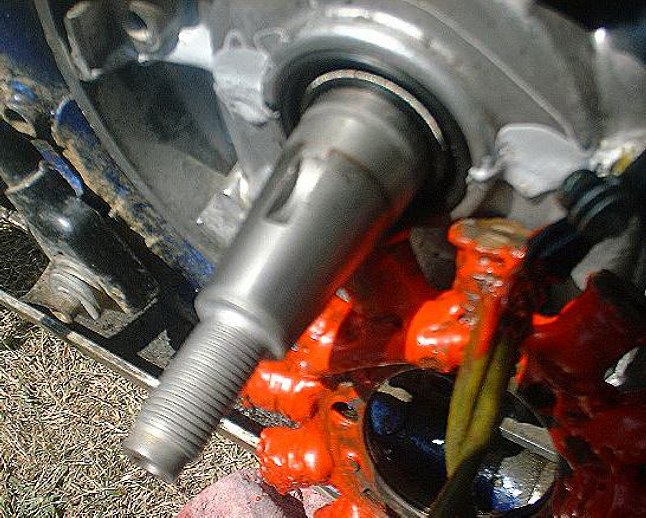
Use "Anti-Seize" on the crankshaft and flywheel for easier removal the next time you need to pull the flywheel.
Coat the end of the crankshaft and the Degree Key with anti-seize.

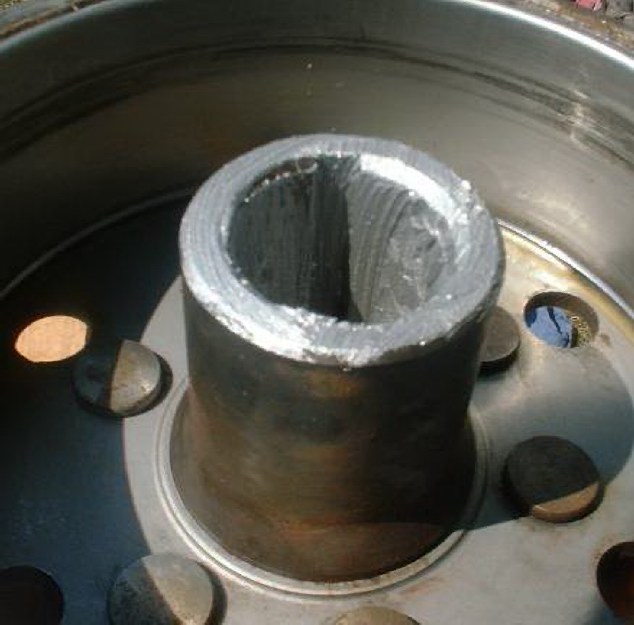
Here you can see the groove in the flywheel where the keyway goes. Coat it with anti-seize and line up the groove with the Degree Key.
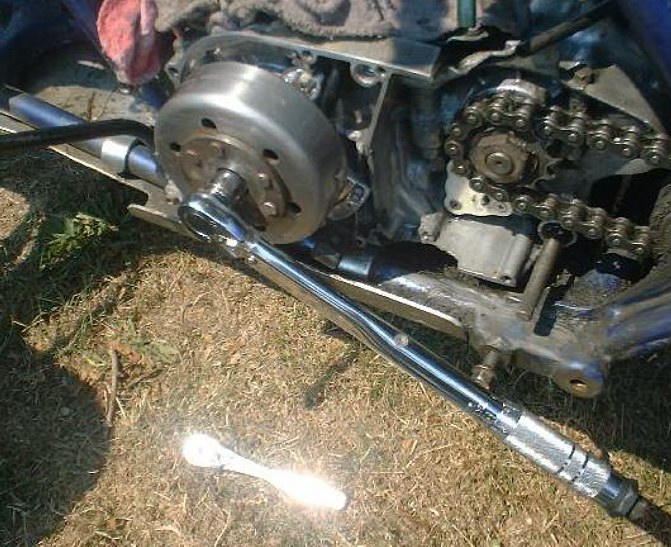
Install the flywheel and the flywheel nut. The nut will seat the flywheel onto the crankshaft. Make sure the groove in the flywheel lines up with the keyway in the crankshaft. Use a torque wrench and tighten up the 17 mm nut to 59 ft-lbs. Bolt your sidecase cover back on, then your gear shifter and foot peg and go ride !!
The time for installing the Degree Key should take anywhere from 1 to 2 hours from start to finish.
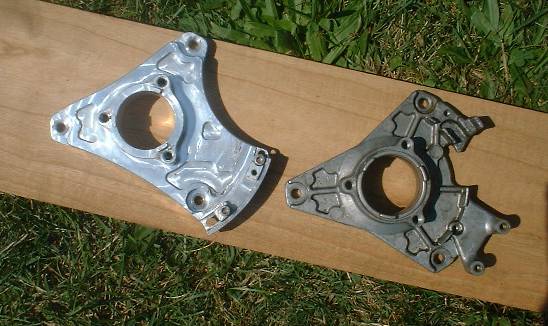
Trinity Adjustable Stator Plate
The Trinity stator plate replaces the stock stator plate. The stator plate is a..... metal plate that mounts to the left side of the engine case and your stator and pickup coil are mounted onto it. The Trinity stator plate is adjustable because the pickup coil mount is movable. By moving your pickup coil you can advance or retard the timing. The Trinity plate is adjustable from -4 to +10, as opposed to a Vito's Degree Key which is available only at +4 or +7 advance.
The directions for installing an adjustable timing plate are very similar to installing a Degree Key so im going to skip alot of pictures and get directly to the stator plate pics. First off...... remove the foot peg, gear shifter, sidecase, flywheel and stator. And now some pictures........
Here it is......... note the adjustable pickup coil mount.
Trinity billet stator plate on the left.... stock stator plate on the right.
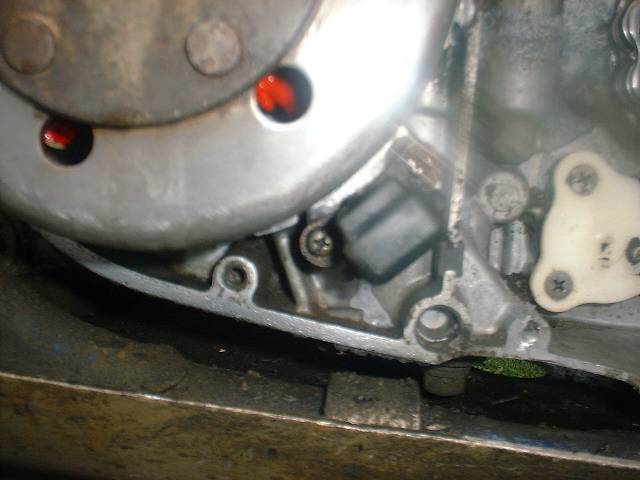
This picture shows the pickup coil (black box under the flywheel) that will be mounted on the Trinity plate.
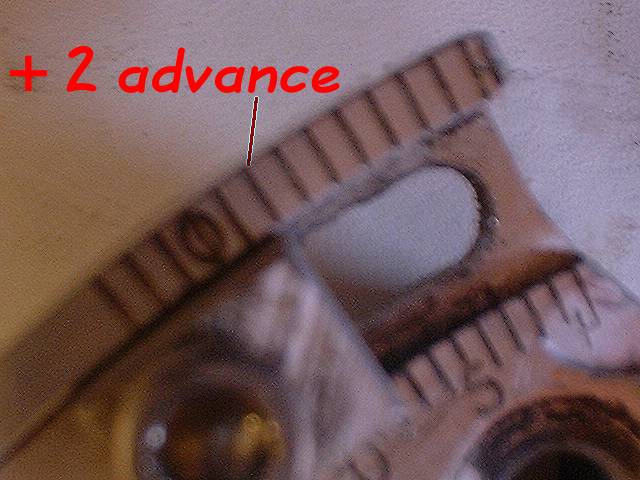
These close-up pics are a bit fuzzy, but you should get the point. What you are looking at is the timing marks etched into the timing plate. The front edge of pickup coil mount is lined up with the marks in the plate to set the timing. This is where my timing is currently set at..... plus 2 advance.
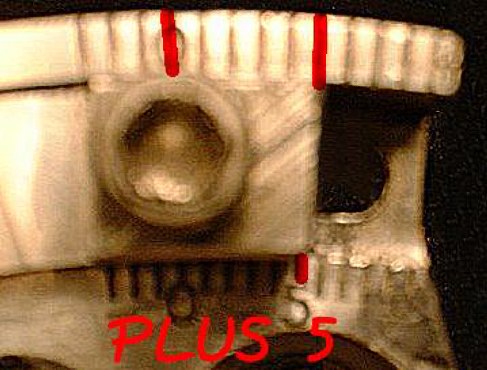
Timing set at plus 5
This is the stock stator and stator plate, you need to remove the 2 brackets on the back of the stator plate that holds the wires leading to the stator. You can see the pickup coil in the palm of my hand.
Here is the Trinity plate mounted to the case. The Degree Key has been removed and the stock keyway was reinstalled.
Once the Trinity plate is mounted, reinstall the stator, flywheel, sidecase etc........ The time for installing the Trinity stator plate should take anywhere from 1 to 2 hours from start to finish. You can adjust your timing by moving the pickup coil, and adjusting the pickup coil can be done without removing the flywheel.
Now............ go ride !!
TBZ Website Updates | Banshee Zone Board | SIGN THE GUEST BOOK | Top End Rebuild | Bottom End Rebuild | Transmission Pics | Kick starter Related | Clutch and Stator | General Specs | Torque Specs | Carburetor Specs | Pilot Jet Page | Air Screws Page | Needle Jet | Main Jet Page | Cool Head Compression Chart | V.I.N. Chart | Cylinder Bore Chart | Banshee Zone Color Scheme Chart | Premix Chart | Banshee Zone Gallery Page 1 | Banshee Zone Gallery Page 2 | Banshee Zone Gallery Page 3 | Banshee Zone Gallery Page 4 | Banshee Zone Gallery Page 5 | Banshee Zone Gallery Page 6 | Banshee Zone Gallery Page 7 | Banshee Zone Gallery Page 8 | ATV Links | ATV Logos | Vote For The Banshee Zone | Banshee Web Poll | BLUETRAXX.COM Yamaha Chat Room | Maier Radiator Cover | Toomey 2:1 Air Filter System | JL Billet Kick Starter | Hinson Billet Brake Pedal | Pro-Taper Handlebars | Vito's 404 Big Bore + A/R Porting | Ported Big Bore Top End Installation | CPI PIPE PICTURES | FMF FATTY PIPE PICTURES | PAUL TURNER PIPE PICTURES | PRO CIRCUIT PIPE PICTURES | TOOMEY T-5 PIPE PICTURES | Banshee Parts Microfiche | Front Brake Pad Installation | Rear Brake Pad Installation | Repacking Your Aftermarket Silencers | Ignition Timing | My Banshee | The Strippins | Lots Of Banshee Pictures
Ignition Timing